How to extend the volume in Linux on Eumetsat Elasticity
It is possible to extend a Volume from the Horizon dashboard.
Another method is to create a new volume, attach it to a VM, copy all the data from the old volume to the new one, check if all the data is properly copied, then detach and delete the old one. Not all filesystems are resizable.
Warning
It is strongly recommended to backup the volume by creating Volume Snapshot before proceeding with extending the volume.
Warning
If you have a volume < 2TB and you want to extend it above 2TB, please do not follow below instructions. Instead please create a new volume, format it according to another article: How to attach a volume to VM more than 2TB on Linux on Eumetsat Elasticity, attach it to the VM, copy the data from the old volume to the new one, check if it is fully copied, detach and delete the old volume.
You may use following guide to backup the volume: How to create volume Snapshot and attach as Volume on Linux or Windows on Eumetsat Elasticity
Resizing the volume:
In this tutorial we will resize a 1GB volume to 5GB.
First we need to extend the volume in Horizon.
Let’s say that we have a 1GB volume attached to our instance as /dev/vdb:

And we have it mounted in our Linux machine as /dev/vdb1:
eouser@vm-john-01:~$ df -kh
Filesystem      Size  Used Avail Use% Mounted on
udev            1.9G     0  1.9G   0% /dev
tmpfs           394M  640K  393M   1% /run
/dev/vda1        15G  2.7G   12G  19% /
tmpfs           2.0G     0  2.0G   0% /dev/shm
tmpfs           5.0M     0  5.0M   0% /run/lock
tmpfs           2.0G     0  2.0G   0% /sys/fs/cgroup
tmpfs           394M     0  394M   0% /run/user/1001
tmpfs           394M     0  394M   0% /run/user/1000
/dev/vdb1       991M  2.6M  922M   1% /my_volume
We already have some data on it, we don’t want to lose.
First we need to unmount it in Linux:
eouser@vm-john-01:~$ sudo umount /dev/vdb1
Then detach it in Horizon by clicking “Manage Attachments” > “Detach Volume”:
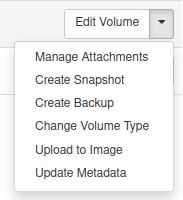
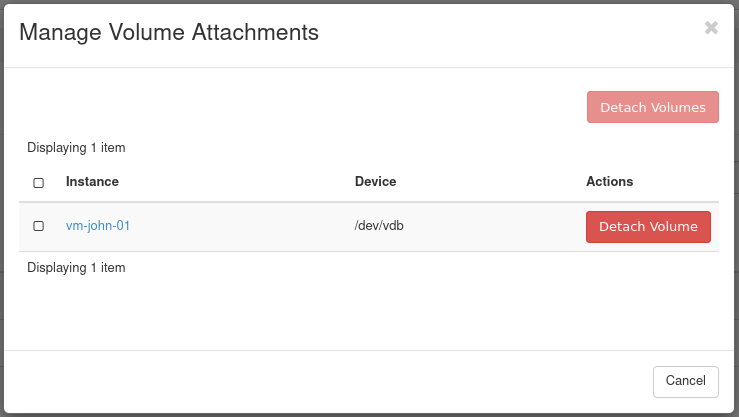
After detaching we will have the “Extend Volume” option available.
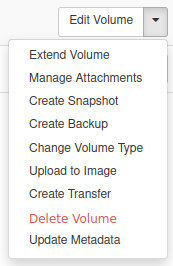
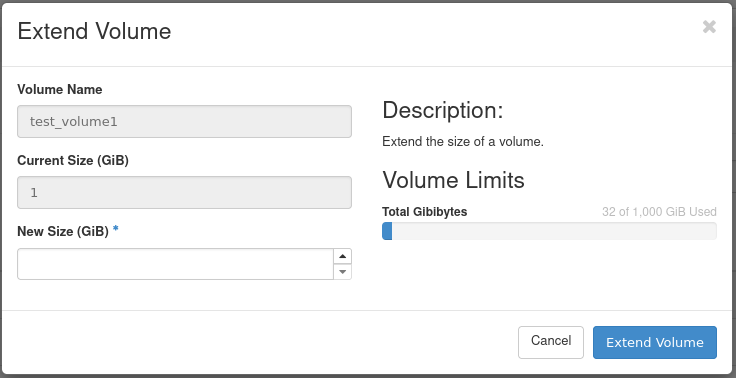
We enter a new size, for example 5GB and click “Extend Volume”:
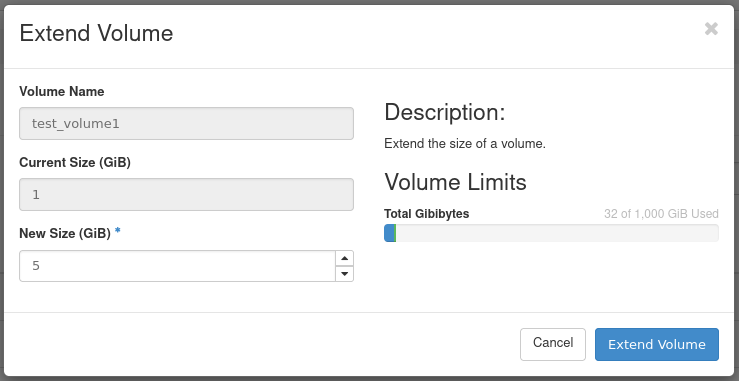
Our new volume size is 5GB. Reattach it to your Virtual Machine again. Now we need to extend our /dev/vdb partition in Linux.
Expand the modified partition using growpart (and note the unusual syntax of separating the device name from the partition number):
eouser@vm-john-01:~$ sudo growpart /dev/vdb 1
CHANGED: partition=1 start=2048 old: size=2095104 end=2097152 new: size=10483679 end=10485727
Next use resize2fs:
eouser@vm-john-01:~$ sudo resize2fs /dev/vdb1
resize2fs 1.45.5 (07-Jan-2020)
Please run 'e2fsck -f /dev/vdb1' first.
Most of the time a filesystem check will be recommended by the system.
eouser@vm-john-01:~$ sudo e2fsck -f /dev/vdb1
e2fsck 1.45.5 (07-Jan-2020)
Pass 1: Checking inodes, blocks, and sizes
Pass 2: Checking directory structure
Pass 3: Checking directory connectivity
Pass 4: Checking reference counts
Pass 5: Checking group summary information
/dev/vdb1: 11/65536 files (0.0% non-contiguous), 8859/261888 blocks
After doing e2fsck we proceed with extending partition:
eouser@vm-john-01:~$ sudo resize2fs /dev/vdb1
resize2fs 1.45.5 (07-Jan-2020)
Resizing the filesystem on /dev/vdb1 to 1310459 (4k) blocks.
The filesystem on /dev/vdb1 is now 1310459 (4k) blocks long.
We can now mount our extended volume again.
eouser@vm-john-01:~$ sudo mount /dev/vdb1
eouser@vm-john-01:~$ sudo df -kh
Filesystem      Size  Used Avail Use% Mounted on
udev            1.9G     0  1.9G   0% /dev
tmpfs           394M  640K  393M   1% /run
/dev/vda1        15G  2.7G   12G  19% /
tmpfs           2.0G     0  2.0G   0% /dev/shm
tmpfs           5.0M     0  5.0M   0% /run/lock
tmpfs           2.0G     0  2.0G   0% /sys/fs/cgroup
tmpfs           394M     0  394M   0% /run/user/1001
tmpfs           394M     0  394M   0% /run/user/1000
/dev/vdb1       5.0G  4.0M  4.7G   1% /my_volume
The new size is now 5GB and the data that was previously there is intact.